What You Will Need
Before you begin, make sure you have the following:
• A PDF file of your architectural floorplan or building layout
• A web browser (Chrome, Firefox, Safari, or Edge)
• An email address to create your free account
EvacPlan Generator accepts standard PDF files of any size. Architectural drawings, CAD exports, scanned blueprints, and simple floor sketches all work well.
Step 1: Create Your Account
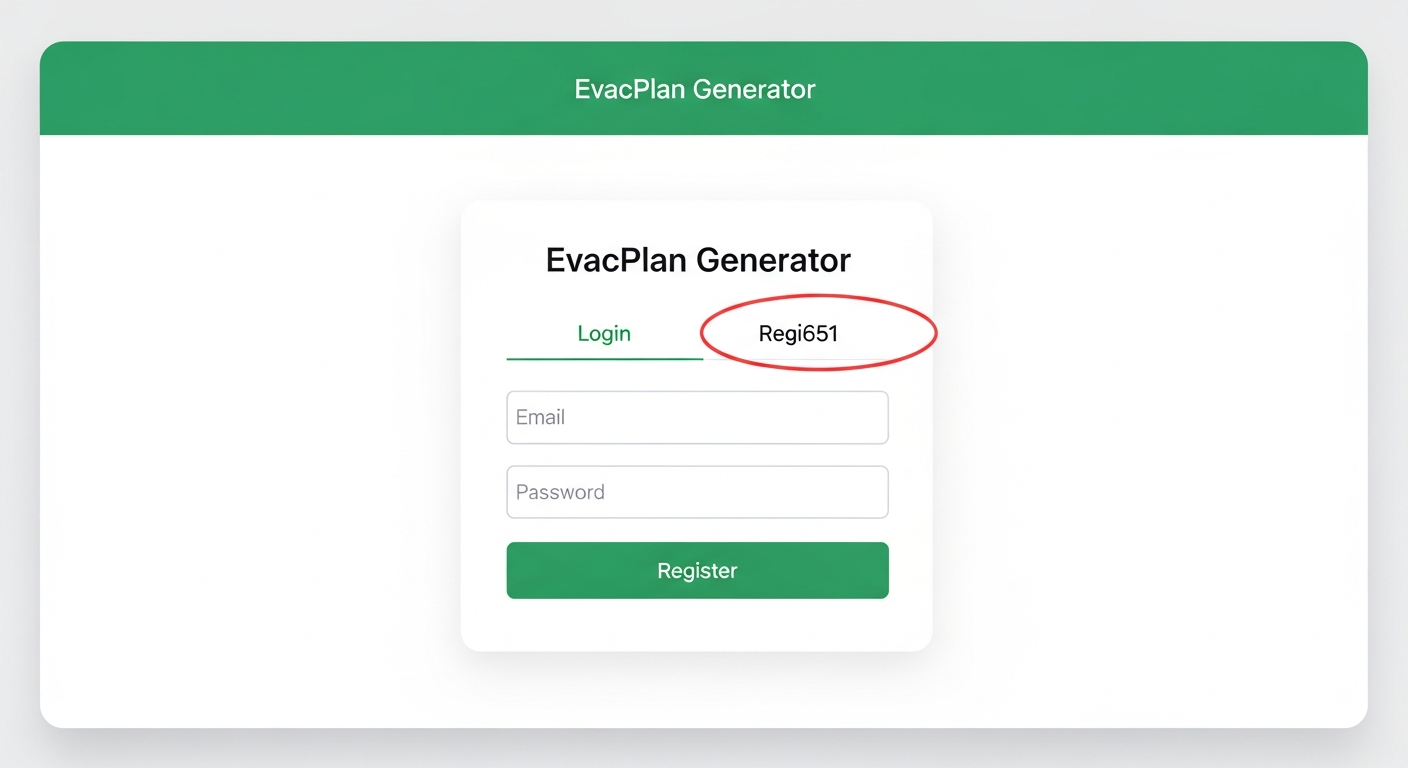
To get started, navigate to the EvacPlan Generator app. You will be greeted by the login screen where you can create a new account.
1
Go to the EvacPlan Generator app page and click the "Register" tab at the top of the login card.
Tip: If you already have an account, simply log in with your existing email and password.
2
Enter your email address and choose a password, then click the "Register" button.
Step 2: Create a New Project
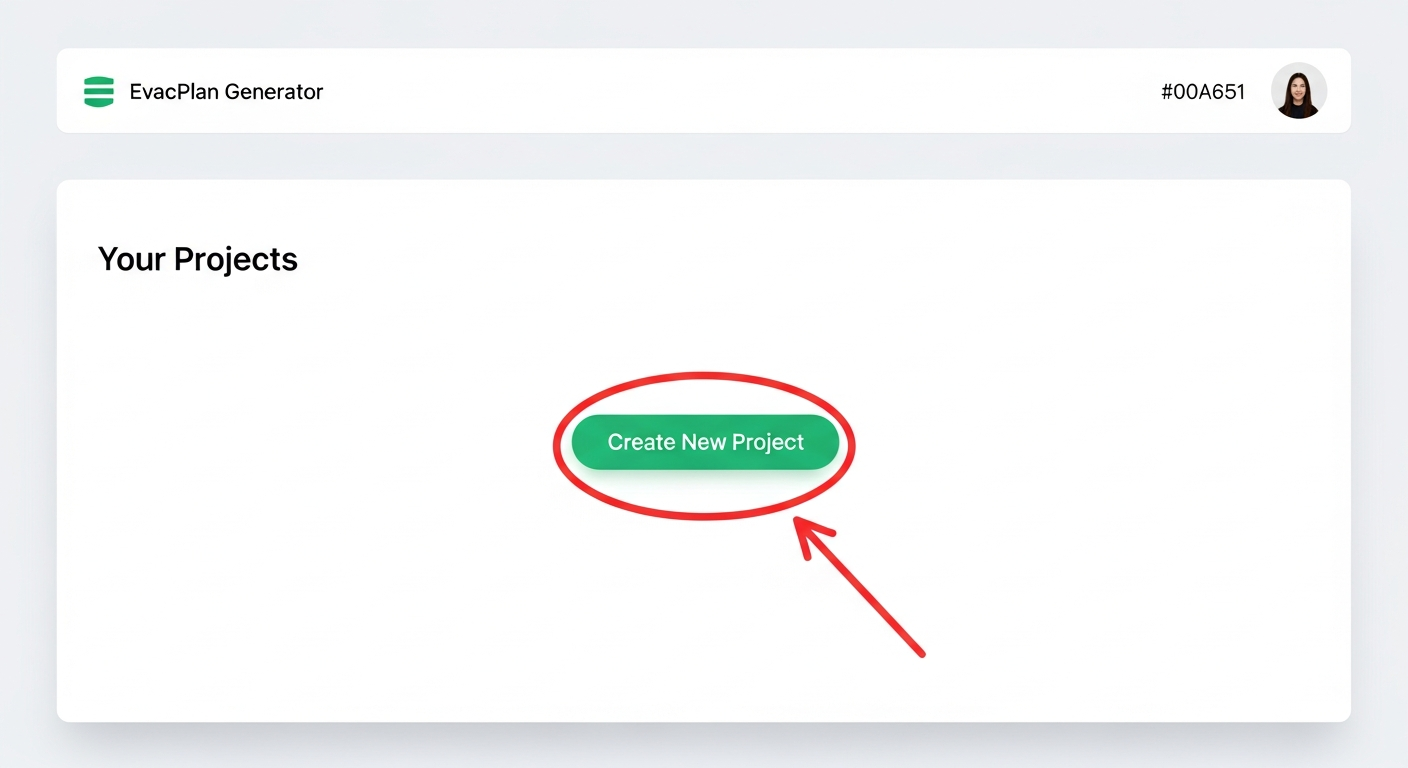
Once logged in, you will see your project dashboard. Projects help you organize your evacuation plans by building, site, or client.
1
Click the "Create New Project" button on your dashboard.
Tip: Each project can contain multiple floorplans and evacuation plan pages, so you typically need just one project per building or site.
2
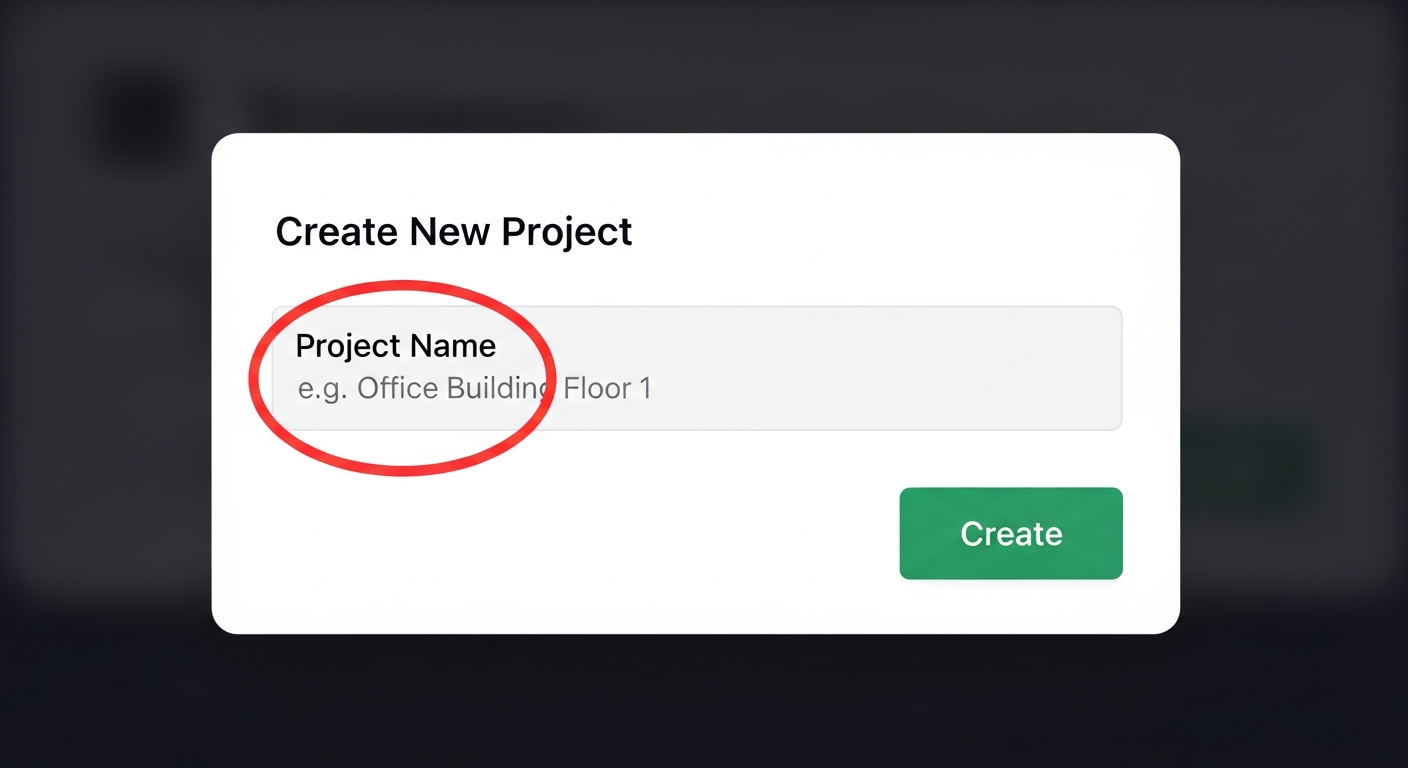
Enter a descriptive name for your project (e.g. "Office Building - Floor Plans") and click "Create".
Step 3: Upload Your PDF Floorplan
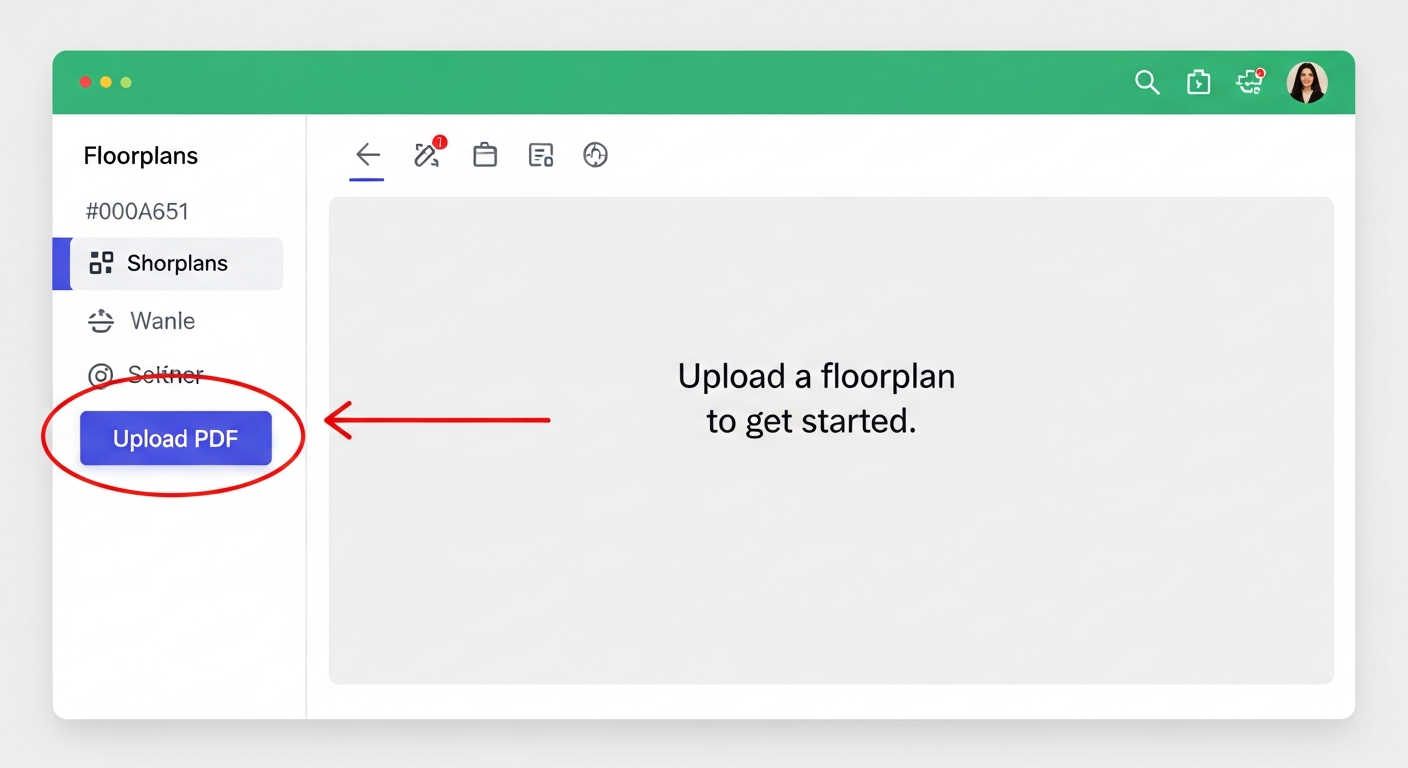
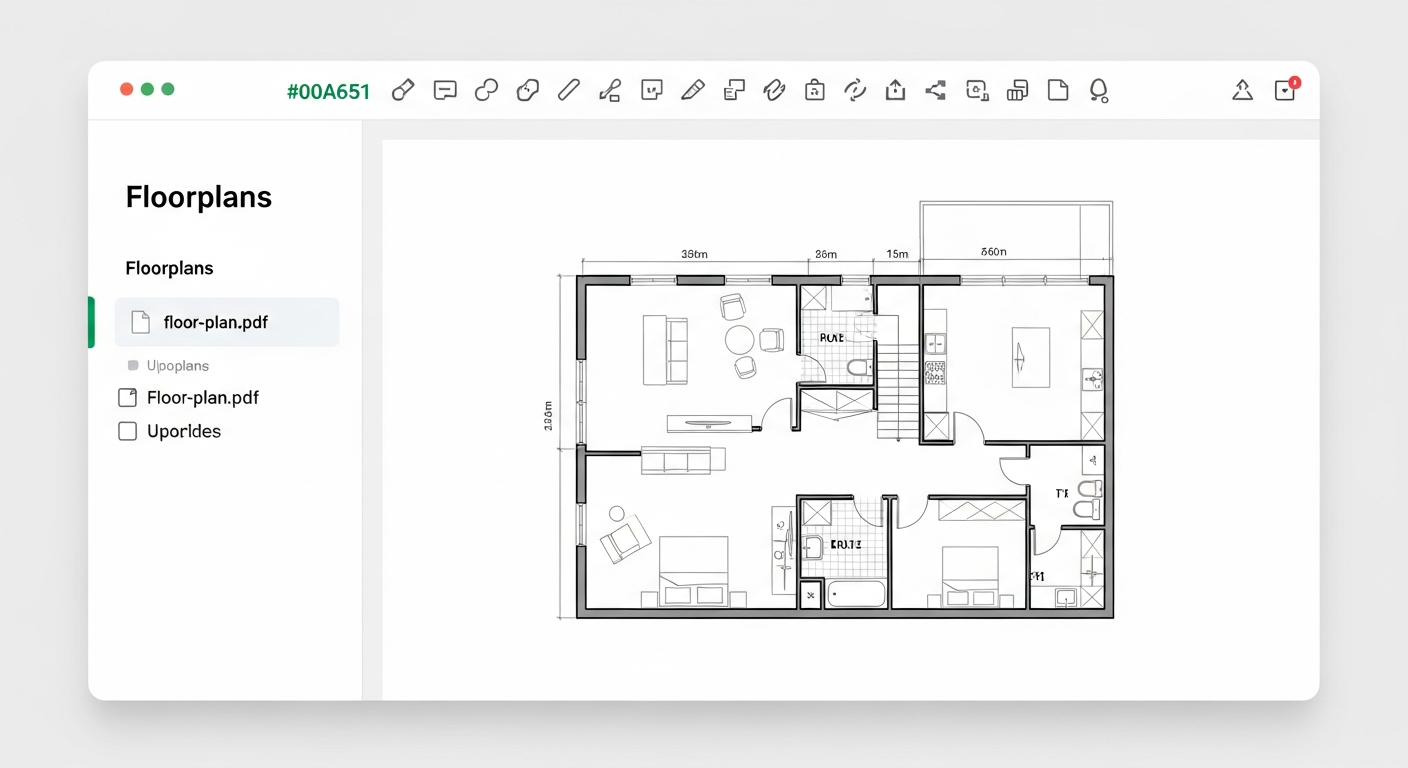
After creating your project, you will be taken to the editor. This is where you upload your PDF floorplan and start building your evacuation plan.
1
In the left sidebar, find the Floorplans section and click the "Upload PDF" button.
Tip: You can upload multiple PDF files to the same project if your building has several floors.
2
In the file picker dialog, navigate to your PDF file, select it, and click "Open".
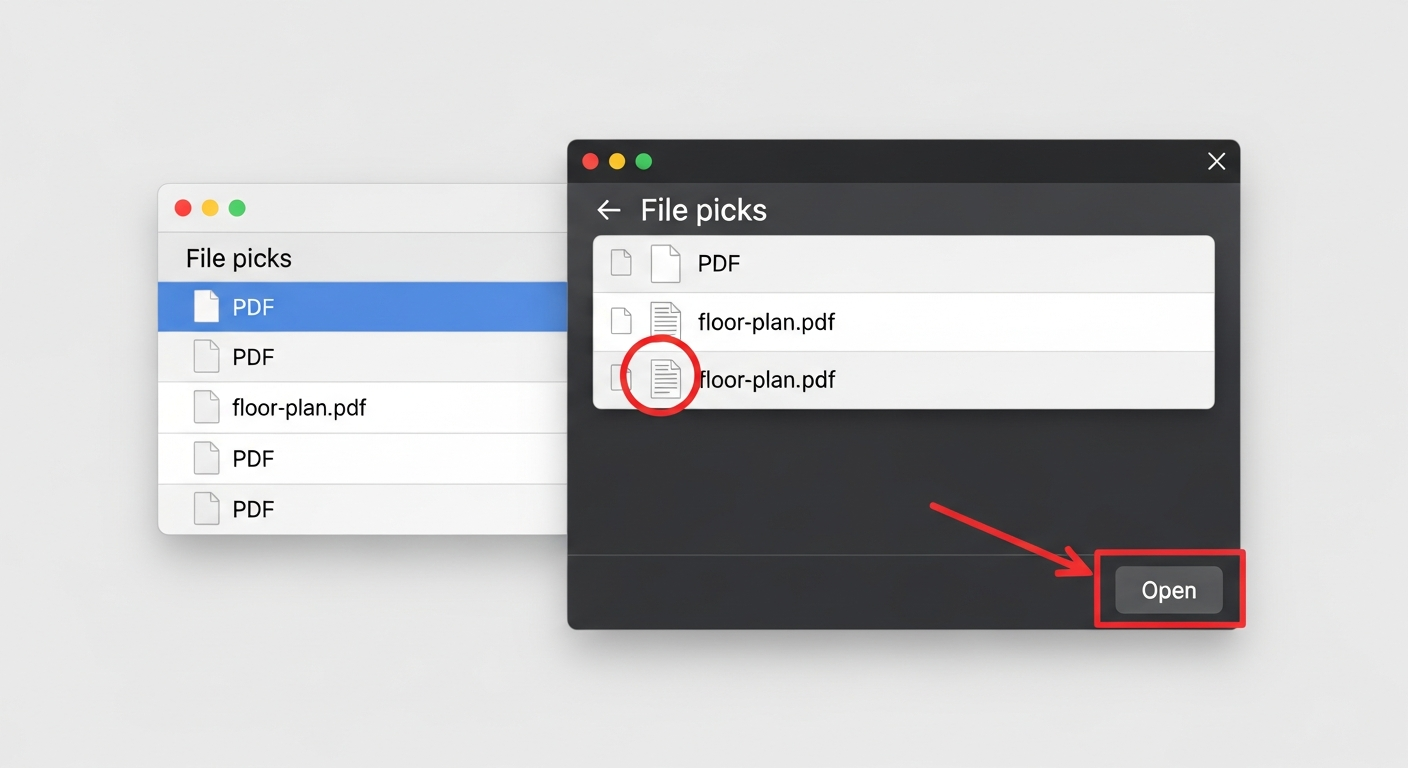
3
Wait a moment while your PDF is processed. Once complete, your floorplan will appear in the main editor area, ready for annotation.
Tip: If your PDF has multiple layers (common in CAD/architectural drawings), you can toggle layer visibility using the Layers panel to simplify the drawing.
What to Do Next
Now that your floorplan is uploaded, you are ready to start creating your evacuation plan. Here are the recommended next steps:
• Add emergency exit route lines using the Route tool in the toolbar
• Place fire safety icons (extinguishers, alarms, exits) using the Icon Picker
• Add a "You Are Here" marker to help building occupants orient themselves
• Customize the Map Key legend to explain your symbols
• Use the Simplify tool to reduce clutter from complex architectural drawings
• Export your finished plan as a professional PDF ready for printing and posting
Each of these features has its own tutorial to help you get the most out of EvacPlan Generator.