Before You Begin
Step 1: Select the Draw Route Tool
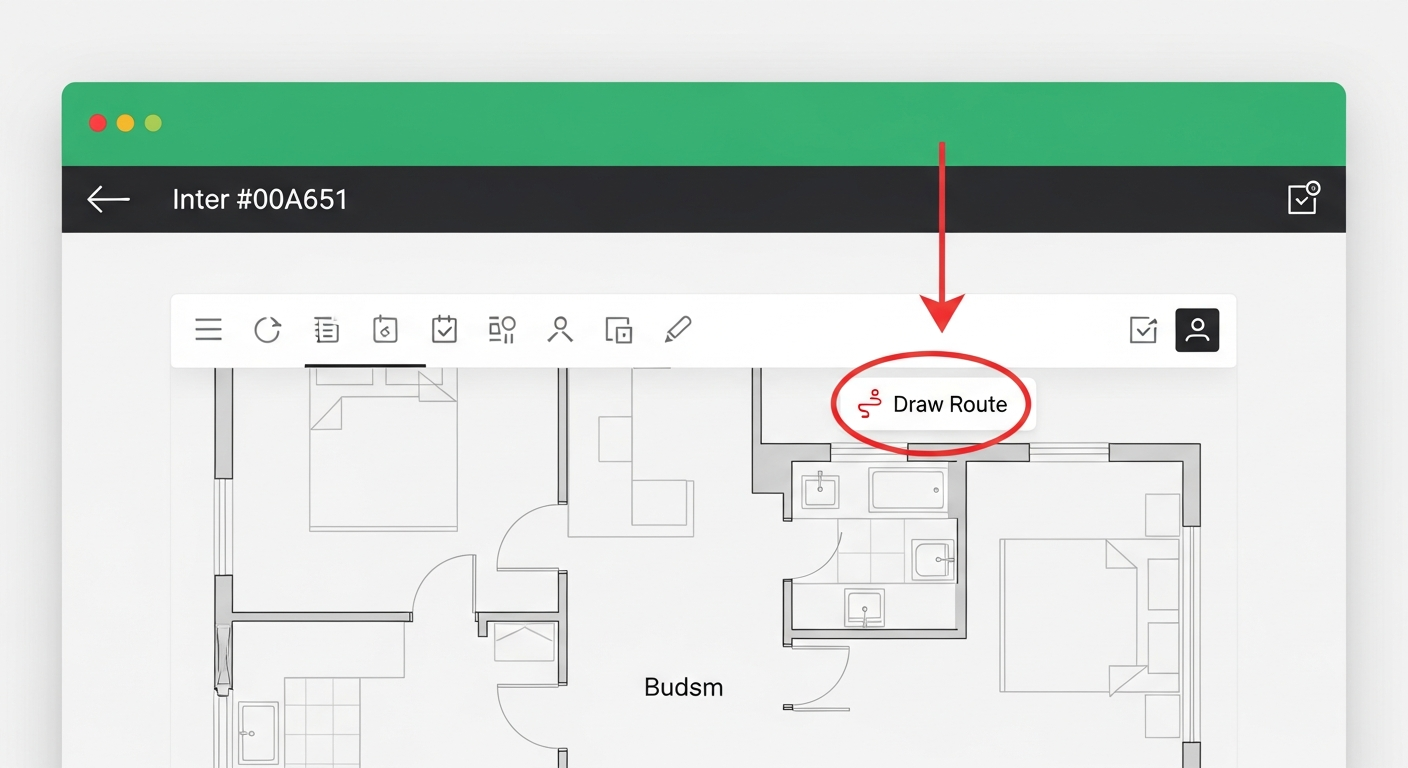
Click the "Draw Route" button in the toolbar. It has a path/route icon. When active, the button turns green.
Step 2: Draw Your Route Lines
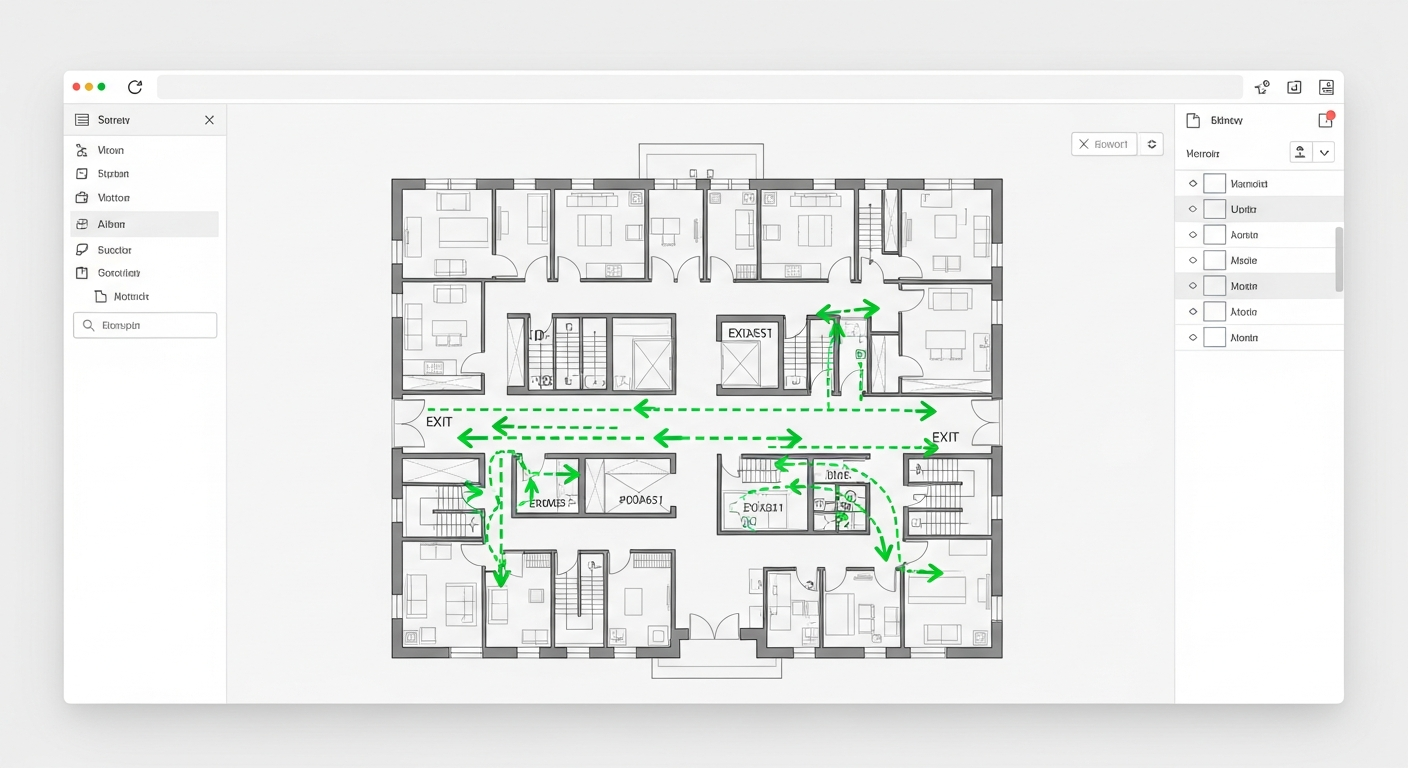
Click on the floor plan where you want the route to start. This is typically inside a room or at a corridor intersection.
Continue clicking to add more points along the evacuation path. The line follows your clicks through corridors and toward exit doors.
Double-click or press Enter to finish the current route line. You can then start drawing another route from a different location.
Step 3: Customize Route Appearance
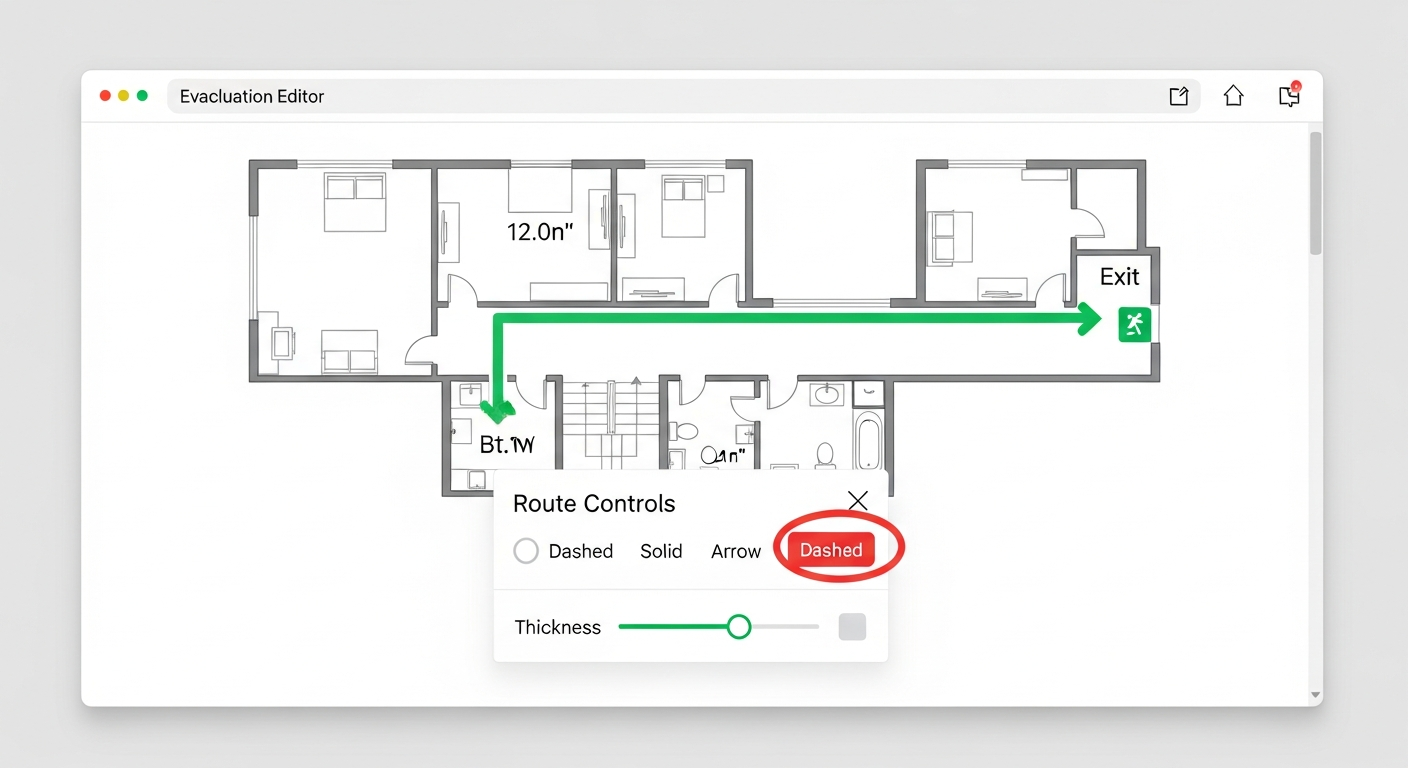
Use the Style buttons to switch between Dashed, Solid, or Arrow styles. Dashed lines with arrows are the most common format for evacuation routes.
Adjust the Thickness slider to make lines thinner or thicker. A thickness of 3-5 works well for most floor plans.
Step 4: Edit Existing Routes
Click on any existing route line to select it. A highlight appears around the selected route.
Press Delete or Backspace to remove a selected route. You can also click the Delete button that appears in the toolbar when a route is selected.
Use Ctrl+Z (or Cmd+Z on Mac) to undo any changes. Ctrl+Y redoes them.
Tips for Effective Evacuation Routes