Why You Need a "You Are Here" Marker
A "You Are Here" marker is one of the most important elements on any posted evacuation plan. It shows the viewer exactly where they are standing in the building, which helps them quickly identify the nearest exit route.
Most fire safety codes and standards, including NFPA 101 and local fire marshal requirements, expect posted evacuation plans to include a clear indicator of the viewer's current location.
Step 1: Open the You Are Here Picker
The "You Are Here" button is located in the toolbar, right next to the Place Icon tool.
1
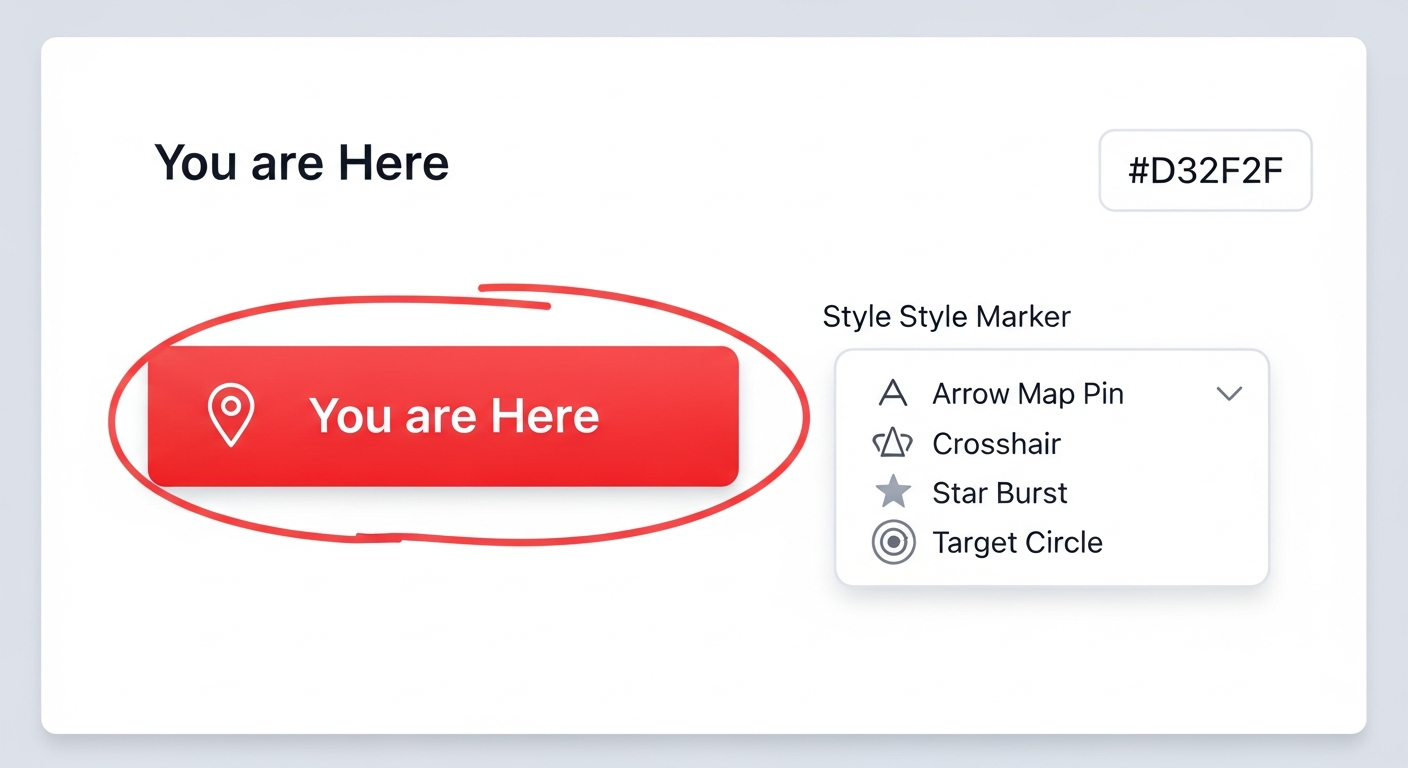
Click the "You are Here" button in the toolbar. It is styled in red to stand out from the other tools.
2
A style picker appears showing 5 different marker styles: Arrow, Map Pin, Crosshair, Star Burst, and Target Circle. Click on the style you prefer.
Tip: The Map Pin style is the most universally recognized. Arrow style works well when you want to point at a specific spot.
Step 2: Place the Marker
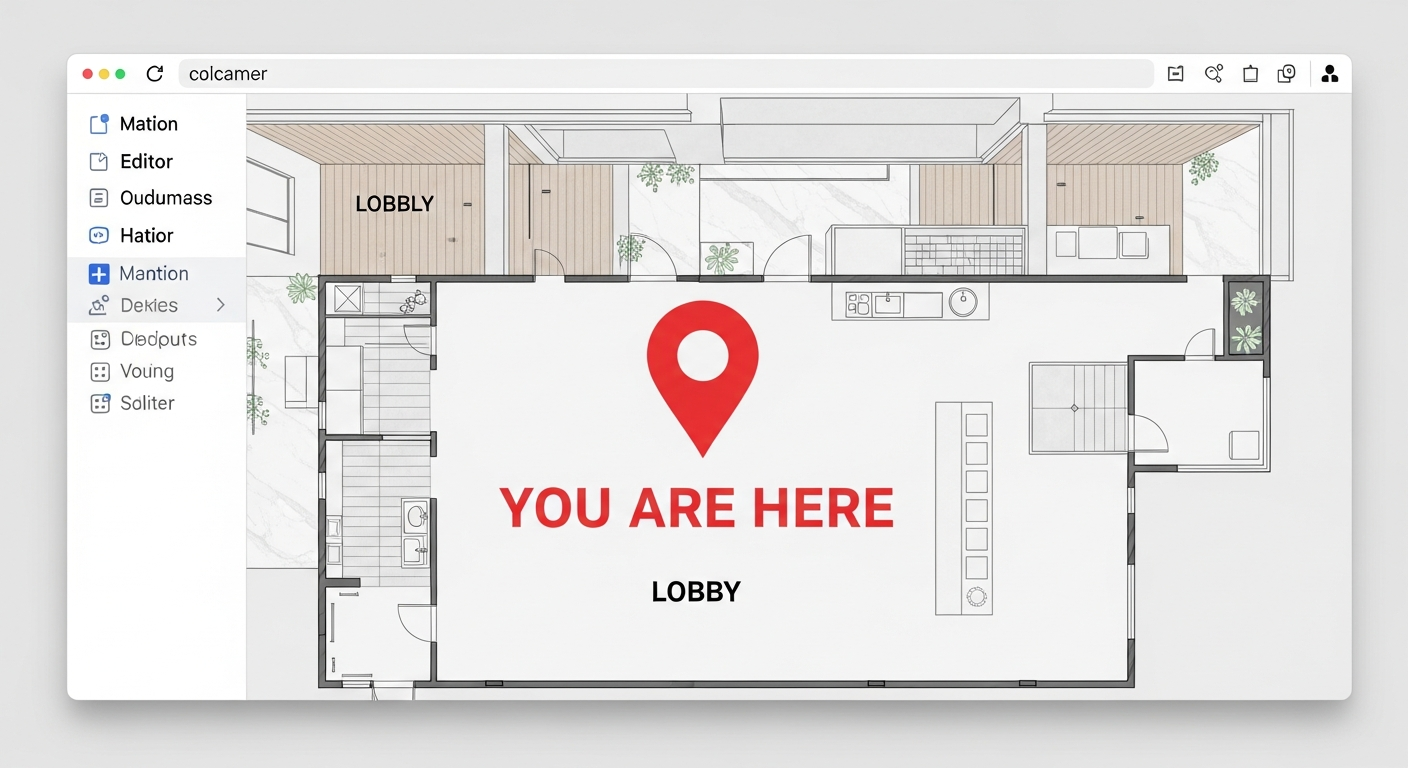
With a style selected, click on the floor plan to place your "You Are Here" marker.
1
Click on the floor plan at the exact location where the printed evacuation plan will be posted. The marker appears with a red icon and bold "YOU ARE HERE" text label below it.
Tip: Think about where you will physically hang or post the printed plan in the building. The marker should correspond to that wall or bulletin board location.
2
Drag the marker to fine-tune its position if needed. The marker and its text label move together.
Step 3: Multiple Plans, Multiple Markers
If you are creating plans to post in different locations within the same building, you will need a separate page for each posting location.
1
Use the "Save As" feature to create a copy of your current plan. This snapshot captures all your routes and icons.
Tip: Each saved copy can have its own "You Are Here" marker in a different position, so you can create posting-specific plans from the same base layout.
2
On each copy, move or re-place the "You Are Here" marker to match where that particular copy will be posted.
Best Practices for You Are Here Markers
Follow these guidelines for effective marker placement:
• Place the marker at the exact location where the plan will be physically posted
• Make sure the marker is large enough to spot immediately when looking at the plan
• Use a consistent marker style across all plans in the same building
• The marker appears in your Map Key legend automatically, labeled "You Are Here"
• Consider the viewer's perspective — when someone looks at the posted plan, the marker should make it obvious where they are
• If posting near a stairwell or elevator, position the marker accordingly
• Each posted plan in a building should have its own unique marker position